Connecting your Ledger Nano X to the Monero GUI Wallet might seem like a complex process, but it's fundamentally about creating a secure link between your hardware wallet and a dedicated software interface. This setup allows you to manage your Monero holdings with enhanced security, leveraging the offline protection of your Ledger device. This guide will walk you through each step, ensuring you understand how to get your Monero GUI Wallet operational with your Ledger Nano X.
Disclaimer: This article is for informational purposes only and does not constitute financial advice. Always conduct your own research before using any platform or service.
What You Need Before You Start
Before you begin the setup process, ensure you have the following ready:
Requirement Details
Device Type | A Ledger Nano X hardware wallet and a computer (desktop or laptop). |
Software/Applications | The Ledger Live application installed on your computer, and the Monero GUI Wallet application downloaded from the official Monero website. |
Internet Connection | A stable internet connection is essential for downloading software, installing apps, and synchronizing your wallet with the Monero network. |
What Is Setting Up Monero GUI with Ledger?
Setting up your Monero GUI Wallet with a Ledger Nano X involves installing the Monero application on your Ledger device and then linking that device to the Monero GUI Wallet software on your computer. This combination allows you to securely manage your Monero by keeping your private keys isolated offline on your hardware wallet, while using the convenient interface of the Monero GUI Wallet for transactions. Think of your Ledger device as a secure vault for the unique key to your Monero, and the Monero GUI Wallet as the secure door that lets you access and manage what's inside that vault.
Hardware Wallet: A physical device that stores your cryptocurrency's private keys offline, protecting them from online threats.
Monero GUI Wallet: The official graphical user interface application for managing Monero, allowing you to send, receive, and store Monero.
Private Keys: Secret pieces of information that prove ownership of your cryptocurrency and allow you to authorize transactions.
Step-by-Step Guide
This guide breaks down the process into clear phases, from preparing your Ledger device to managing your Monero with the GUI wallet.
Installing the Monero Application on Your Ledger Device
The first step is to prepare your Ledger Nano X by installing the necessary Monero application via Ledger Live.
- Open the Ledger Live application on your computer.
- Connect your Ledger device to your computer using its USB cable.
- Click on the Manager tab located in the left-hand menu.
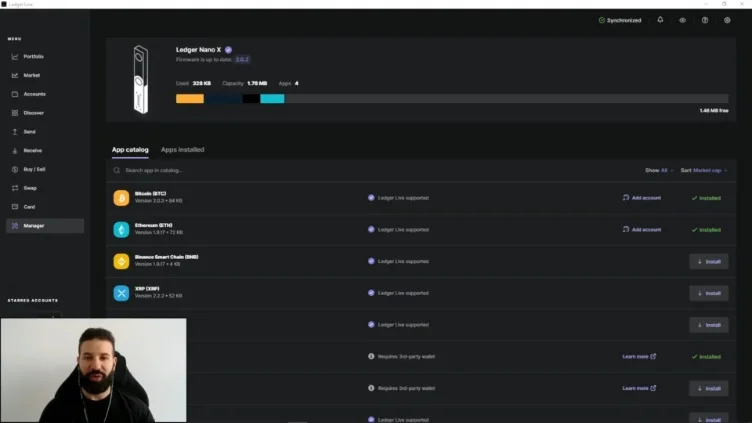
- In the App catalog search bar, type 'Monero' to find the application.
- Click the Install button next to the Monero application.
- Wait for the installation to complete. Once finished, you can close Ledger Live for the remainder of this setup.
Downloading and Installing the Monero GUI Wallet
Next, you will need the Monero GUI Wallet application on your computer.
- Download the Monero GUI Wallet from the official Monero website. Ensure you download the correct version for your operating system.
- Install the downloaded application onto your computer by following the on-screen prompts.
Configuring the Monero GUI Wallet for Your Ledger Device
Now, you will link your Ledger Nano X to the Monero GUI Wallet.
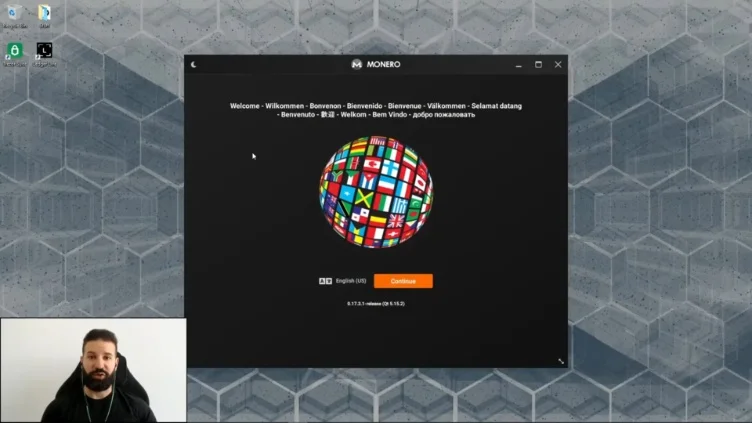
- Open the Monero GUI Wallet application on your computer.
- On your Ledger Nano X device, navigate to the Monero application and open it. Your Ledger screen should display "Monero is ready."
- When prompted by the GUI Wallet to choose a mode, select Simple mode. This mode is recommended for beginners as it allows faster access without needing to download the entire Monero blockchain. (The Advanced mode offers full control but requires downloading the entire blockchain, which can take several days).
- On the next screen, select Create a new wallet from hardware to integrate your Ledger device.
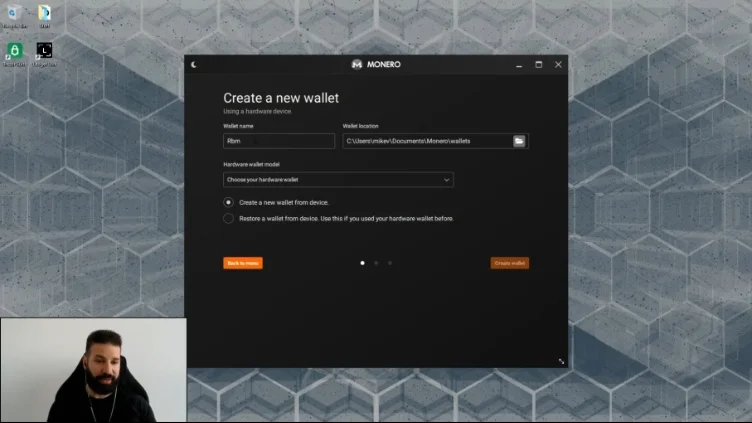
- Enter a unique Wallet name for your new Monero wallet.
- Confirm that your hardware wallet (e.g., Ledger Nano X) is selected.
- Click Create wallet.
- Your Ledger device may ask you to approve the View Key export. For enhanced privacy, you can choose to reject this on your Ledger device.
- Enter a strong Password for your Monero wallet. This password should contain a combination of letters, numbers, and symbols. Then, re-enter the password to confirm.
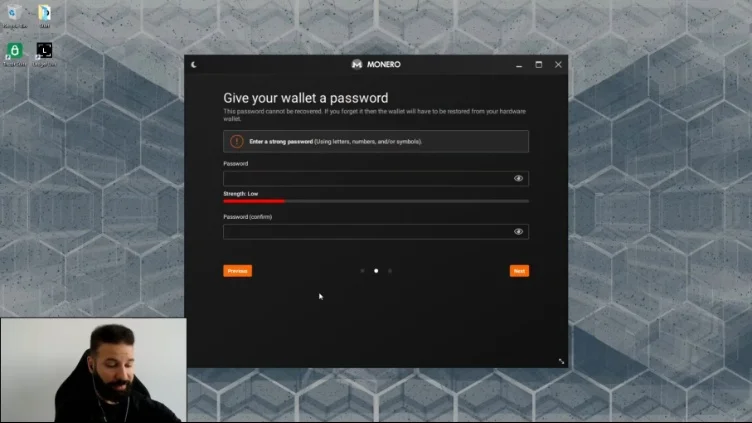
- Click Next or Create Wallet.
- On your Ledger device, you will be prompted to review and confirm several details of the transaction. Scroll through these details and press both buttons on your device to Accept each step.
- Wait for the daemon to synchronize. This process connects your Monero GUI Wallet to the Monero network and can take some time, especially if it's the first synchronization. The wallet status in the bottom left corner will show its synchronization progress.

Receiving Monero
Once your wallet is set up and synchronized, you can receive Monero.
- In your Monero GUI Wallet, navigate to the Receive tab to view your primary Monero wallet address.
- Carefully copy your wallet address. You can often click a button to copy it to your clipboard.
- On your Ledger Nano X device, the screen may display your wallet address for verification. Compare this address with the one you copied to ensure accuracy.
- Provide this address to the sender or use it on an exchange to withdraw Monero to your Ledger-secured wallet.
Sending Monero
To send Monero from your Ledger-secured wallet:
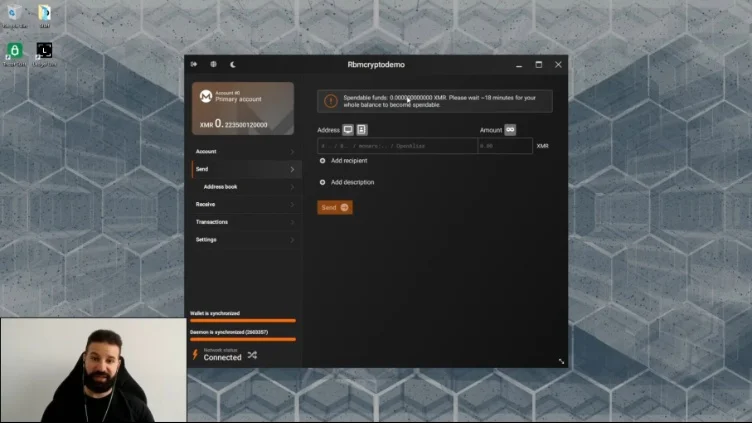
- Navigate to the Send tab within your Monero GUI Wallet.
- Paste the recipient's Monero address into the designated address field.
- Enter the amount of Monero you wish to send.
- On your Ledger Nano X device, review all transaction details presented, including the amount, recipient address, and network fee. Press both buttons on your device to Accept each confirmation step.
- When prompted by the Monero GUI Wallet, enter your wallet password.
- Click Send Transaction to broadcast your transaction to the Monero network.
Common Errors and How to Fix Them
Understanding potential issues can help you troubleshoot if something doesn't go as expected.
"Please wait 18 minutes for my whole balance to become spendable and unlocked" (Notification after receiving funds) | Recently received Monero requires a certain number of network confirmations before it is considered fully spendable and unlocked in your wallet. | This is a normal part of the Monero network's security protocol. Wait for approximately 18 minutes (or until the required confirmations are met) for the funds to become fully accessible. |
Daemon synchronization takes a very long time or is stuck. | If you chose Advanced mode, the daemon must download and validate the entire Monero blockchain, which is a large amount of data (around 90 GB) and can take multiple days to complete. | If you are in Advanced mode, this prolonged synchronization is expected. For quicker access and less data download, consider setting up a new wallet in Simple mode (if privacy requirements allow). |
 Frequently Asked Questions
Is setting up Monero GUI with Ledger safe?
Yes, combining the Monero GUI Wallet with a Ledger hardware wallet significantly enhances the security of your Monero. Your private keys, which are essential for spending your Monero, are stored offline on the Ledger device, making them less vulnerable to online threats like malware or phishing attacks.
How long does daemon synchronization take?
The time for daemon synchronization depends on the mode you choose. In Simple mode, it's generally quick because you are not downloading the full blockchain. In Advanced mode, where the entire Monero blockchain is downloaded and validated, synchronization can take multiple days, as the blockchain is quite large.
Does setting up cost anything?
No, setting up the Monero GUI Wallet with your Ledger device does not incur direct costs. You only need to have purchased your Ledger hardware wallet. When sending Monero, standard network transaction fees will apply.
What happens if I reject the View Key export during setup?
If you reject the View Key export on your Ledger device, it enhances your privacy. The View Key allows you to see incoming transactions without being able to spend the funds. By keeping it on your device, you ensure that this sensitive information remains exclusively within the secure environment of your Ledger.
Can I use my Ledger Nano X with other cryptocurrencies after setting up Monero?
Yes, your Ledger Nano X supports over 5,500 cryptocurrencies. You can install other coin applications via Ledger Live and manage them with their respective wallets or Ledger Live itself, independently of your Monero setup.
Key Terms
- Hardware Wallet: A physical device that stores your cryptocurrency's private keys offline, protecting them from online threats.
- Monero GUI Wallet: The official graphical user interface application for managing Monero, allowing you to send, receive, and store Monero.
- Private Keys: Secret pieces of information that prove ownership of your cryptocurrency and allow you to authorize transactions.
- Daemon: In the context of the Monero GUI Wallet, the daemon is the background process that connects your wallet to the Monero network and synchronizes with the blockchain.
- Simple Mode: A setting in the Monero GUI Wallet that allows users to interact with the Monero network without needing to download and run a full copy of the blockchain.
- Advanced Mode: A setting in the Monero GUI Wallet that involves downloading and validating the entire Monero blockchain, offering full control over your node and enhanced privacy.
- View Key: A key associated with your Monero wallet that allows you to see incoming transactions without being able to spend the funds, enhancing privacy.
Common Misconceptions
It's common to encounter misunderstandings when dealing with new technology. Here are a few clarifications about using Monero with a Ledger device:
- You need to download the entire blockchain to use Monero. This is a misconception. While the Advanced mode in the Monero GUI Wallet does download the entire blockchain for maximum privacy and control, the Simple mode allows you to use your wallet and interact with the Monero network without this lengthy download, making it quicker to get started.
- Your Monero is "on" your Ledger device. Your Ledger hardware wallet does not actually store your Monero coins. Instead, it securely stores your private keys. These keys are what control access to your Monero, which actually resides on the Monero blockchain. The Ledger simply provides the secure means to sign transactions with those keys.